Showing posts with label Mini Album. Show all posts

Tuesday, 5 July 2016

Whoo Hoo! Two posts in one day!

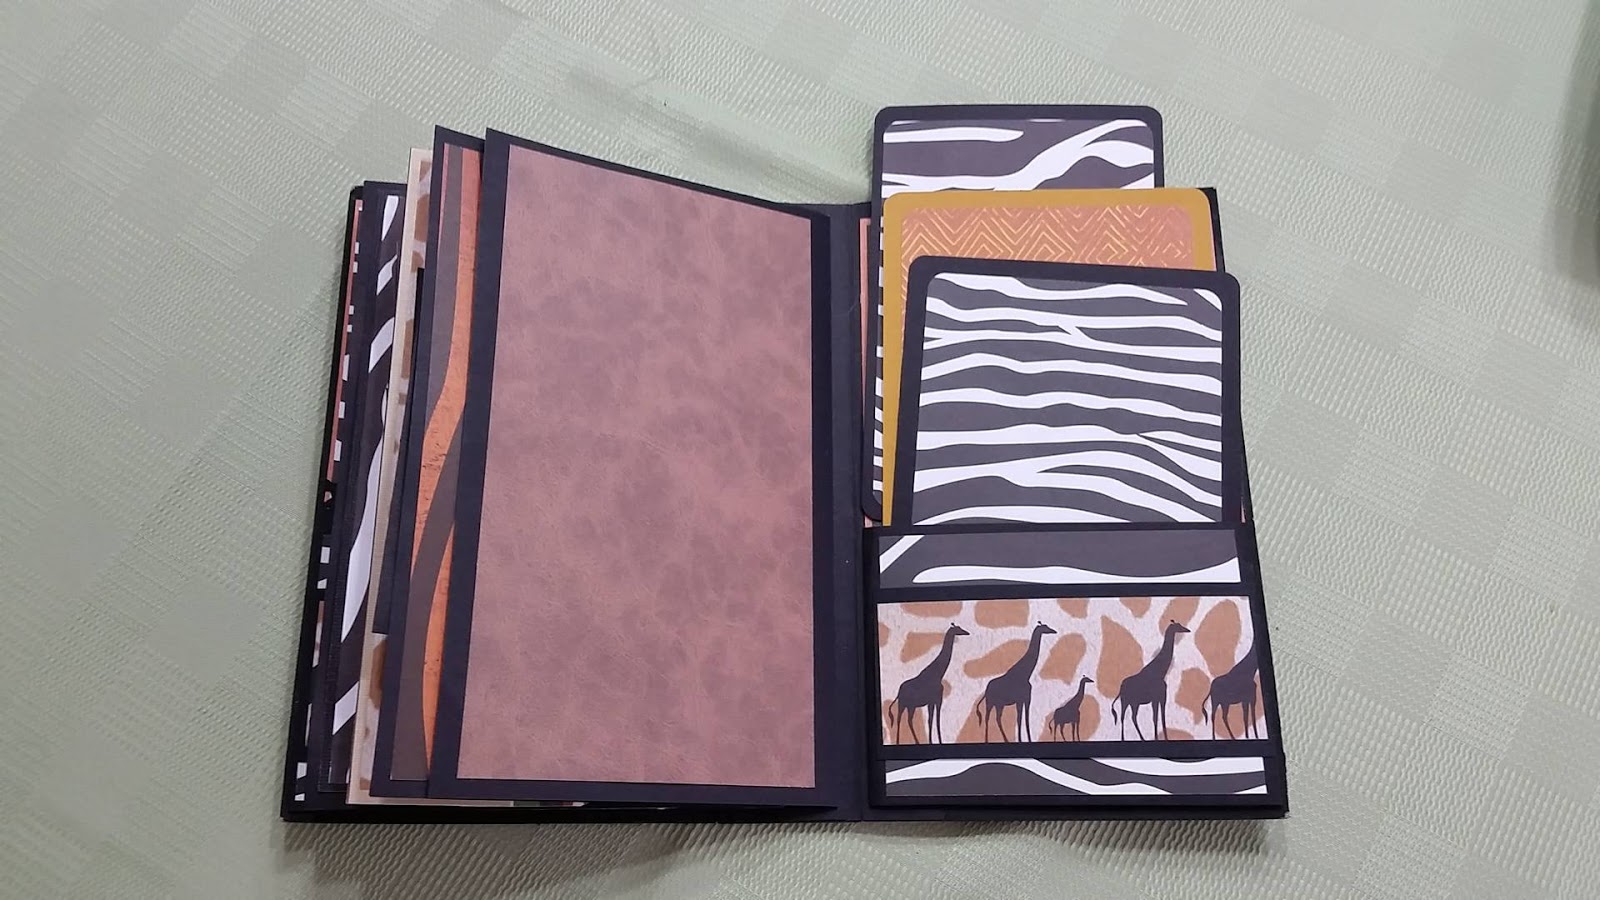
Wow!  2 posts in one day.  I'm trying to get caught back up after being off with my knee replacement.  Here is another mini album that I made for a dear friend of mine.  Her daughter had a beautiful baby boy in April.  The nursery was decorated in The Lion King theme and I had hoped that I could do the same for the mini album.  But it wasn't meant to be....there is no scrapbooking paper out there in that theme.  At least nothing that I could find.  So I picked up some paper in various animal prints and set about to make the mini album using those.  I also picked up a Lion King storybook and cut out some of the pictures.  I matted them on cardstock and used them for photo mats.  There are plenty of flip outs and pockets to house tons of pictures of the gorgeous little addition to their family!  As always your comments are welcome.  I don't mind constructive criticism but please I just ask that you be kind. 


I'm Back! I'm Back!

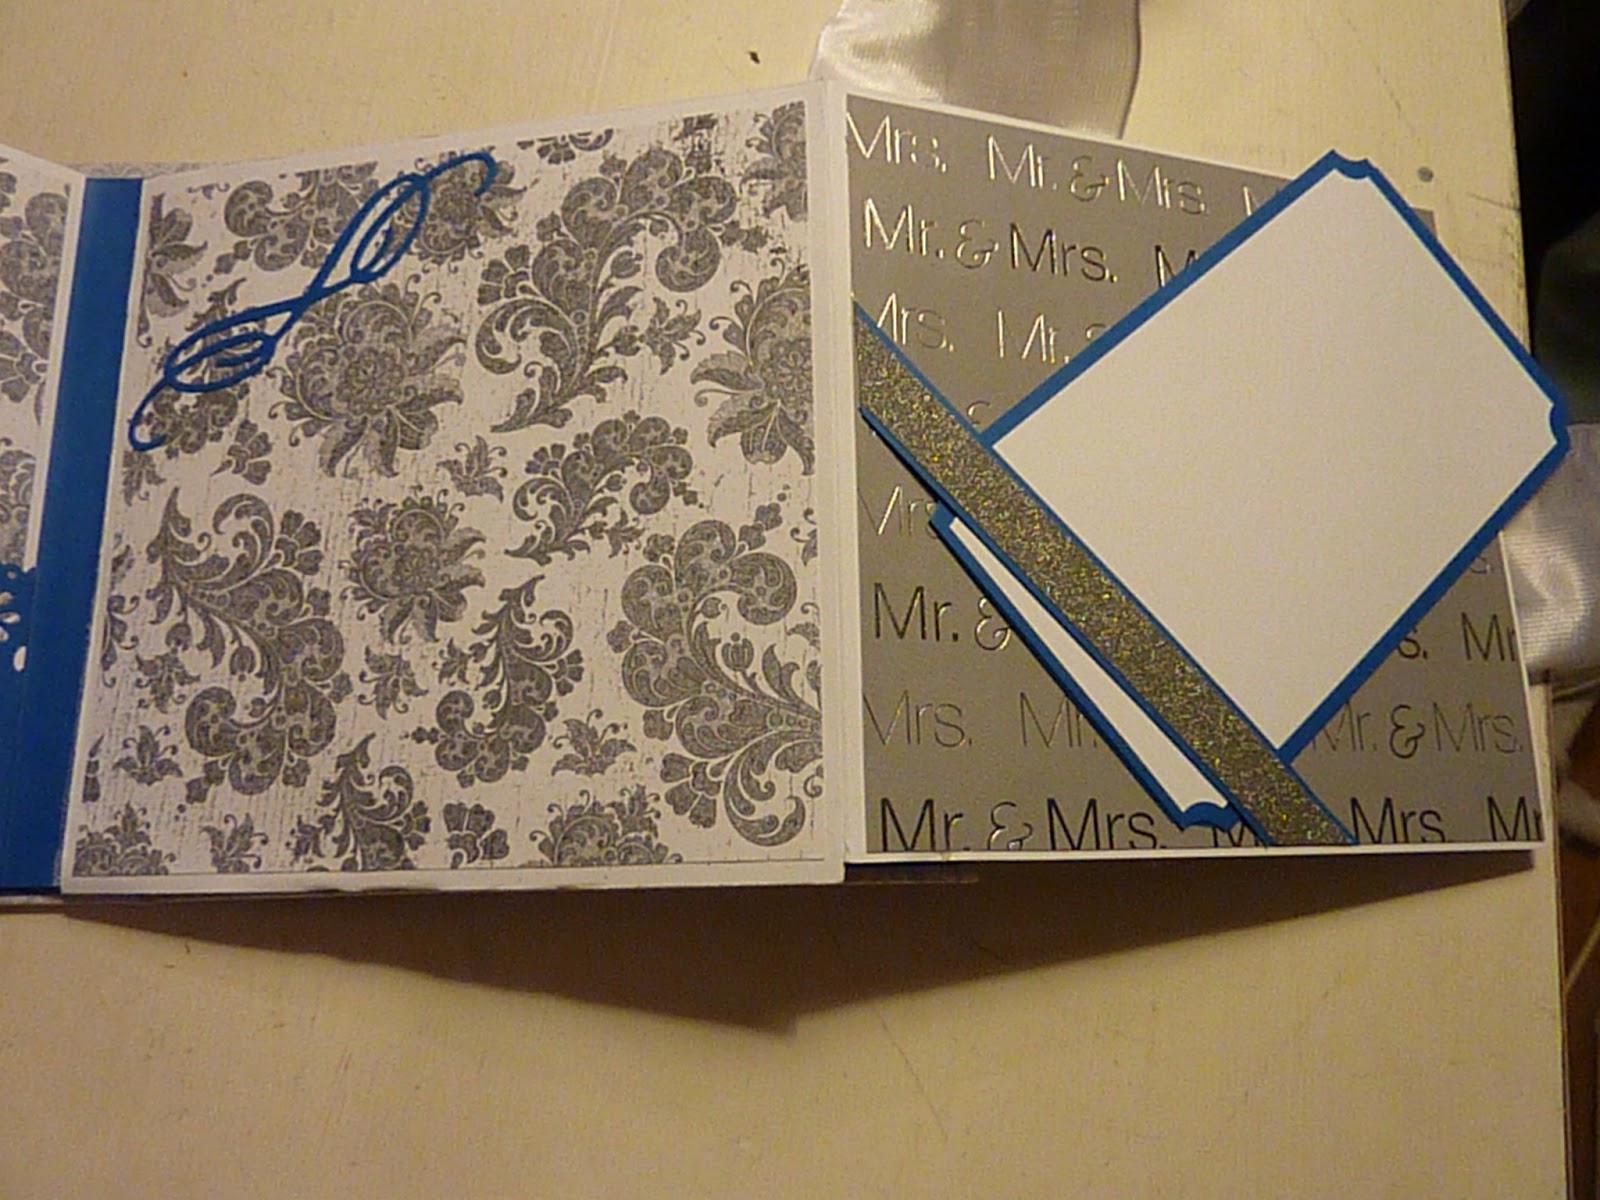
I can't believe I haven't been here since May!  I had a total knee replacement done on May 26 and it's taken me a while to recover and get back in the swing of things.  Exercises became a full time job along with physiotherapy appointments and doctor's appointments.  But I seem to be on the mend now.  I am finally at the point where I can sit long enough to create something.  Before it hurt too much to have my knee bent for such a long period.  The physiotherapist that came to my house was excellent.  She was kind but firm, showed me a ton of exercises to strengthen and to be able to bend that knee more and more.  She was also full of tips and tricks that helped me a great deal.  When she mentioned that she was getting married in November I thought that the perfect little thank you gift for her would be for me to make her a wedding mini album in her wedding colours.  I am proud of the way it turned out.  I really tried to watch a ton of YouTube videos to see how to do various flips, flaps, flops LOL!  When I gave it to her, she told me she got goosebumps and that it was the most thoughtful gift anyone has ever given her.  She kept hugging me and thanking me and telling me she would drop by to show me the filled out version once she had her wedding photos.  Here are some pics showing the different pages in it.  For the first time I tried to do Kathy Orta's Hidden Hinge system and I'm a little embarrassed to say that I mucked it up a little.  It looked so easy!  I used red line tape and maybe that was my mistake.  I wanted it to hold like nothing else but the problem was when I tried to attach my page.  I didn't get it quite down far enough before it stuck and I had a bugger of a time getting it back off again.  I managed to stick it back down but not before I had a few choice words at my misfortune!  I topped off the front with some handmade flowers.  I finally got to use the flower shaping kit that I purchased from Heartfelt Creations and it worked beautifully!   LOL  As always, your comments are welcome, good or bad.  Just be kind!  Oh and if anyone has any hints about getting the page slipped onto the hinge all the way before it sticks, please let me know.  I would really appreciate it! 


This is one of the YouTube videos with Kathy Orta explaining her hidden hinge binding system.  I had watched several of her videos but here's one you can watch in case you'd like to try it. 

Here's the link for the flower shaping tool

Thursday, 4 February 2016

I'm Back! (Finally!)

Wow I can't believe we're into February!  I haven't been on here since July.  I got a job back in July and of course my crafting time went way down.  It's been a few years since I've worked full time and I don't mind telling you that this ole girl was wicked tired!  This job was at an inbound call center and if  you've never worked in a call center...well let's just say it was not fun at all.  For every one person that I was able to help, there were 10 people phoning in and screaming at me for something that was their fault to begin with.  Ok enough...I quit the job at the end of October.  Between getting ready for Christmas and sending out a plethora of resumes, I was limited on crafting time yet again and I wasn't happy about it.  So now I am going to attempt to get caught up by posting a variety of things that I did manage to make while working but never took the time to post pics and blog about them.  The first thing is a min album/birthday book that I made for my niece's 30th birthday in August. 
 
The front and back covers were made from chipboard and covered with Webster's Pages paper.  I've had the paper for a while now and thought it was just perfect as my niece loves red. 


She loves flip flops so this paper was just perfect!


I jazzed up the front with a few things from my stash; flowers, burlap, shells and a big, wide, red ribbon tied in a knot! 


Each page has pockets.


These were chipboard cards that I made up for each month so that she could record any birthdays, anniversaries etc. 


Of course I started her off with a set of cards so that they are ready to send out.  She loved it!  This mini albums have become quite addictive.  They have been so much fun learning different ways of adding pockets and flaps to the pages. 

Sunday, 12 July 2015

Mini Album Made With Heartfelt Creations "Once Upon A Time"


I've got another Mini Album to show you but I also have to tell you that this post is packed with a lot of photographs! I have to tell you that I am so very proud of how this came out. I have been checking countless YouTube videos and tutorials to be able to put together a Mini Album that actually comes out nicely. I generally use the paper that I've already got on hand, but not my good stuff. I hoard that. Until now that is. I have unlocked the 'vault' and have begun using all of those paper pads that previously just sat there. I've been watching all of Shellie Geigle's videos lately and tried what I thought would be the easiest; Learn to Make a Mini Album. She talks you through every detail of the book. She talks slowly enough that you don't need to pause the video hundreds of times but not slow enough that it puts you to sleep. LOL What I did was watch the video first, took some notes, made sure I had any necessary measurements written down and just got a feel for what I was going to be doing. There were 3 videos to making this Mini. Here are the links to Shellie's Videos.

Part 1 - Learn to Make a Mini Album - Designs by Shellie
Part 2 - Learn to Make a Mini Album - Designs by Shellie
Part 3 - Learn to Make a Mini Album - Designs by Shellie

I don't know whether she will see this or not but I wanted to say thank you to Shellie. Finally I have made a Mini Album that looks like it was put together by an adult. LOL Also I just happened to have the exact same paper pad that Shellie was using. I just used mine in a different order. The paper will make all the difference folks. I believe it now. Speaking of paper, Shellie has designed her own paper pad that was introduced just recently. It's on my wish list but I seriously need to get rid of some of the paper I have now before I buy any more. Take a look, I've included the link on where you can buy it. It's called Tranquil Gardens and it's just beautiful!

Designs by Shellie Paper

Judge for yourself. Here are the pics of the finished Mini Album.